Dragon Quest 3 Remake: Zoma\'s Citadel Walkthrough
Author: Lily
Feb 01,2025

Conquer Zoma's Citadel in Dragon Quest 3 Remake: A Comprehensive Guide
This guide provides a complete walkthrough of Zoma's Citadel in Dragon Quest 3 Remake, including treasure locations and boss strategies. Prepare for the ultimate challenge!
Reaching Zoma's Citadel
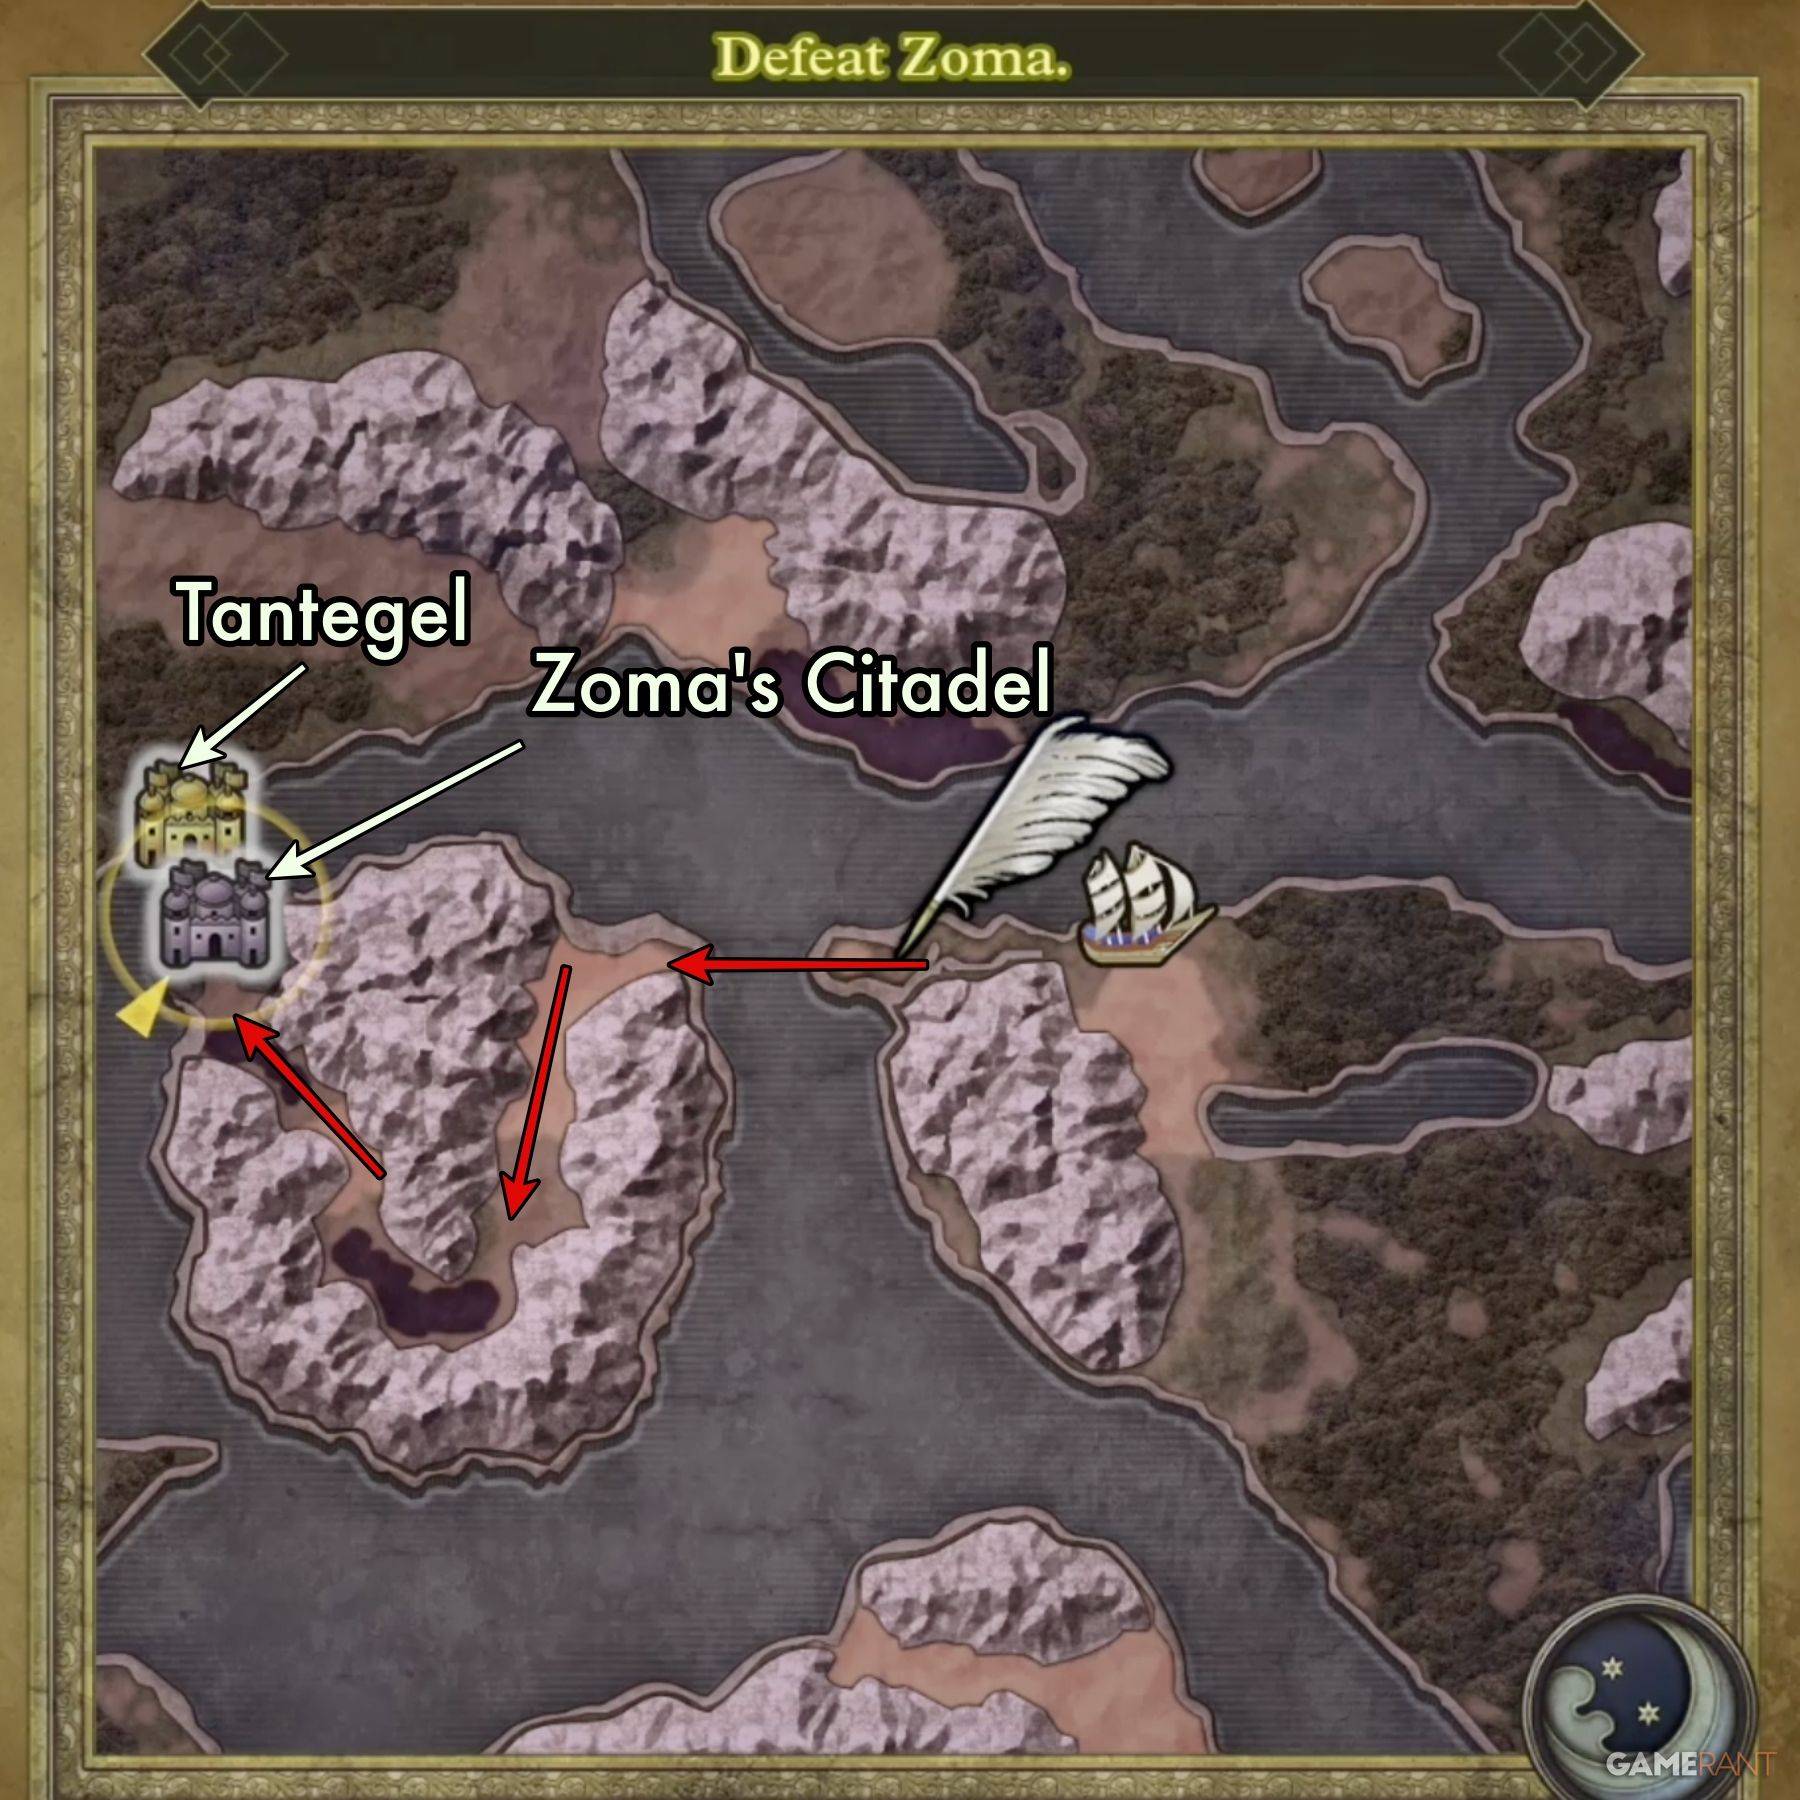
After defeating Baramos, you'll enter a darkened Alefgard. To reach Zoma's Citadel, you need the Rainbow Drop:
Combine these items to create the Rainbow Drop and access the Rainbow Bridge leading to the Citadel.
Zoma's Citadel 1F
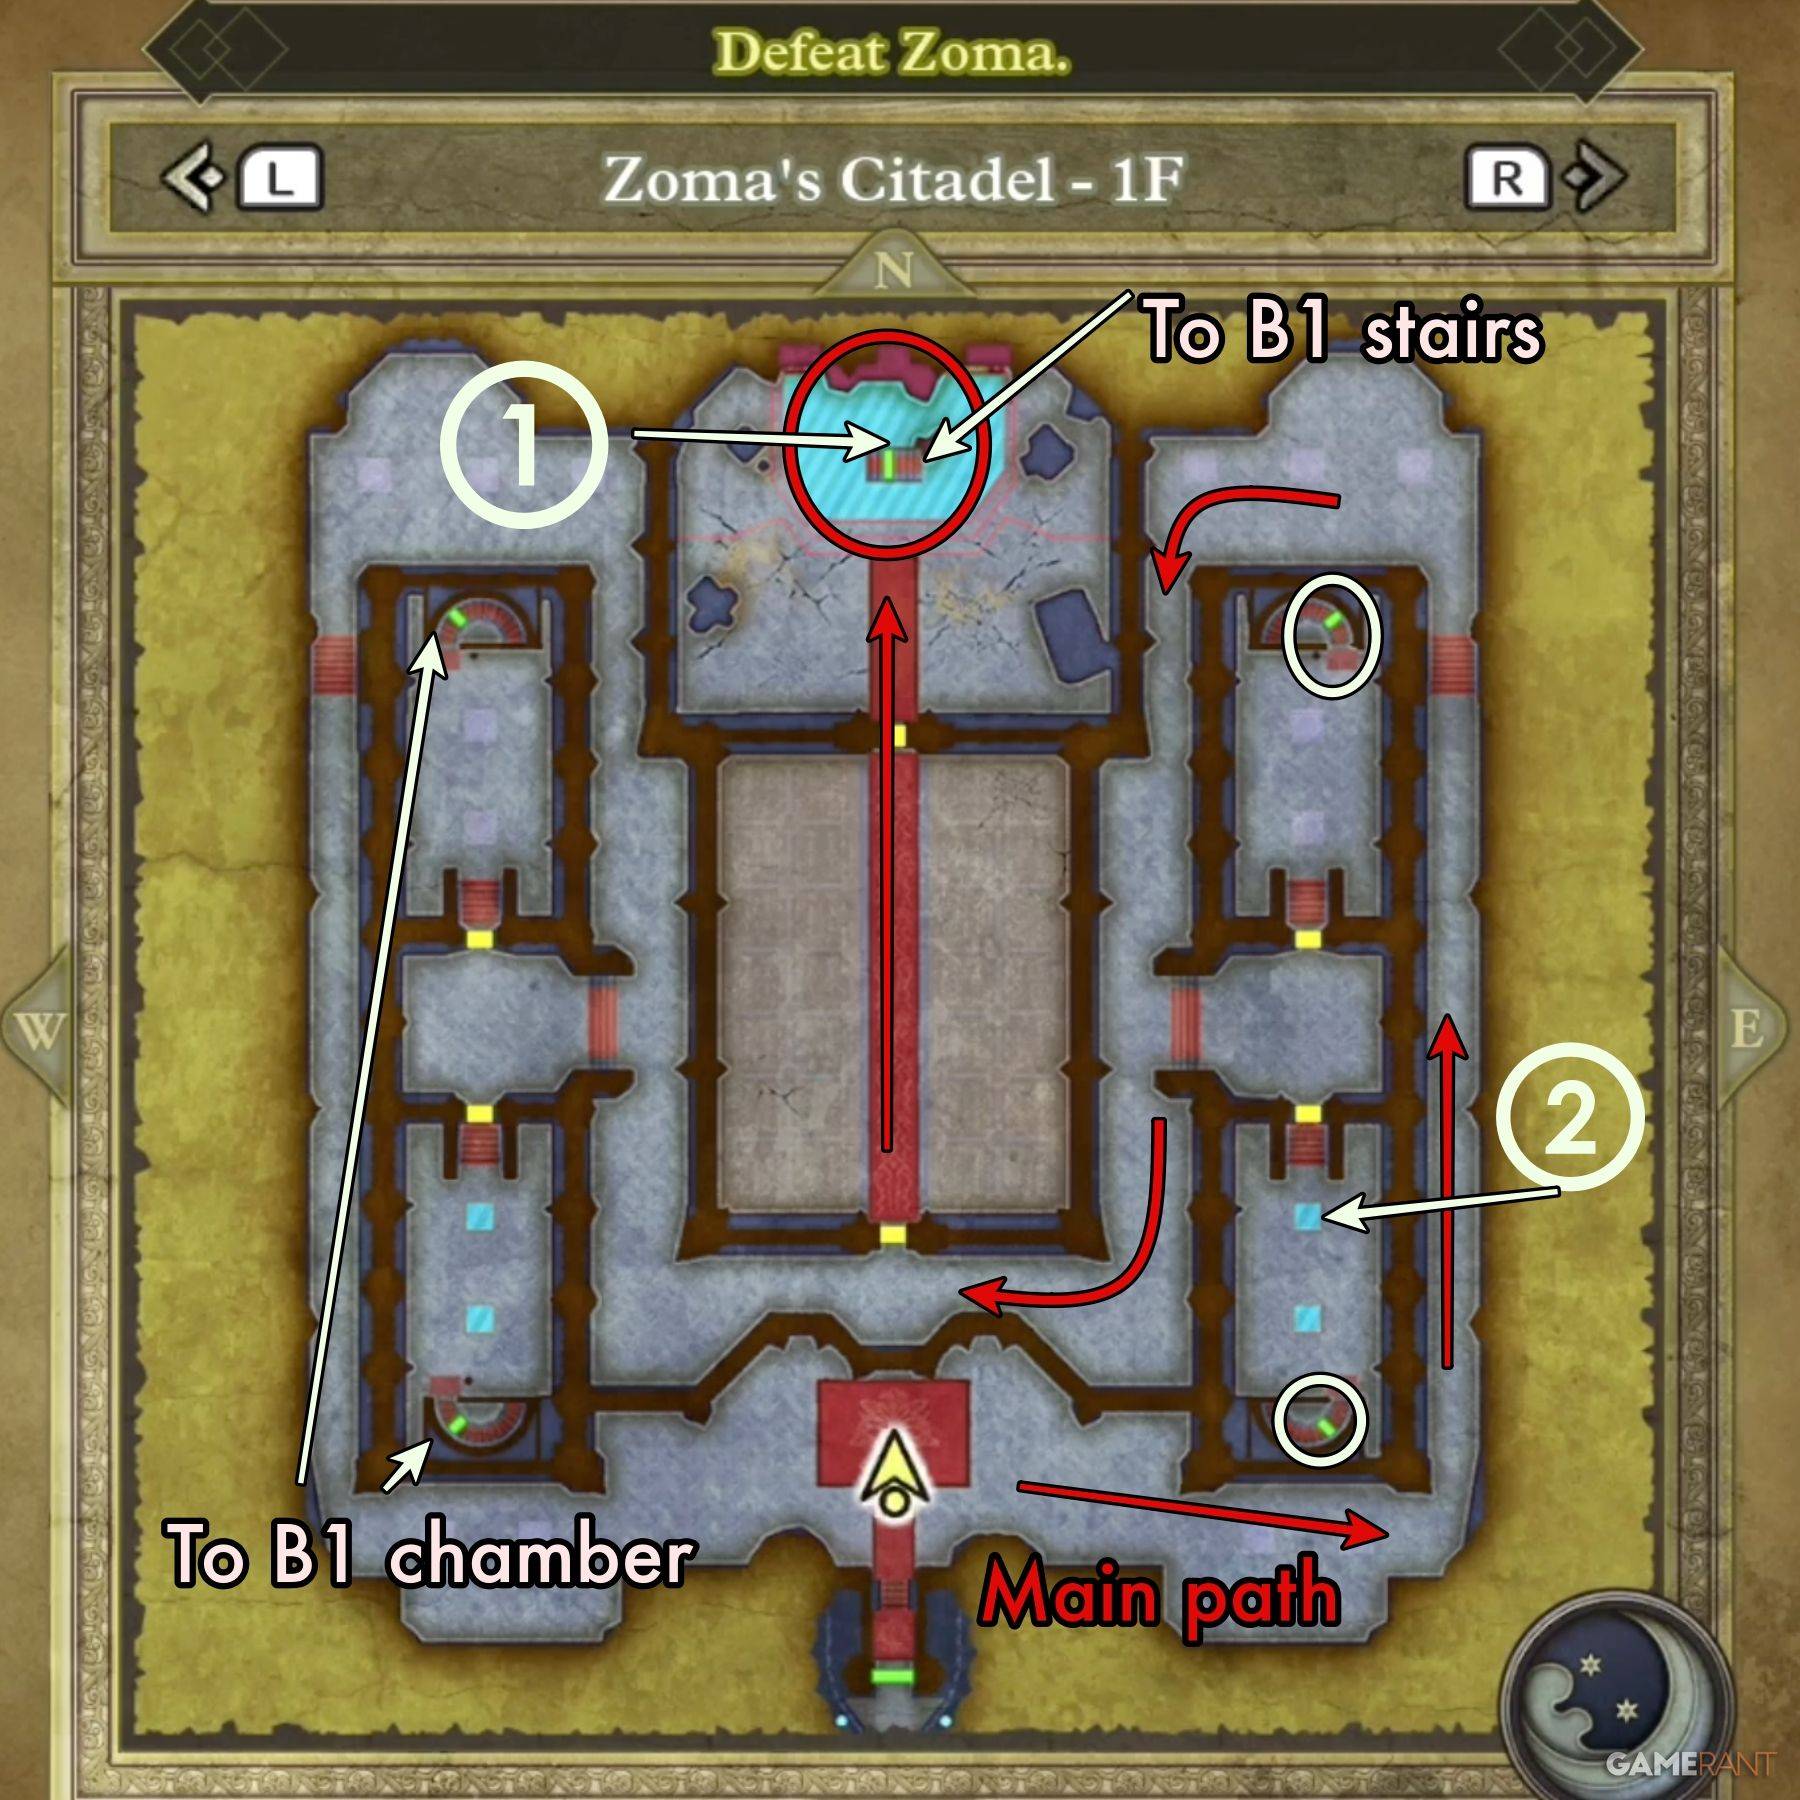
Navigate the first floor to reach the throne in the north. The throne will move, revealing a passage. Explore side chambers for treasure:
Prepare for a Living Statue encounter in the central chamber.
Zoma's Citadel B1
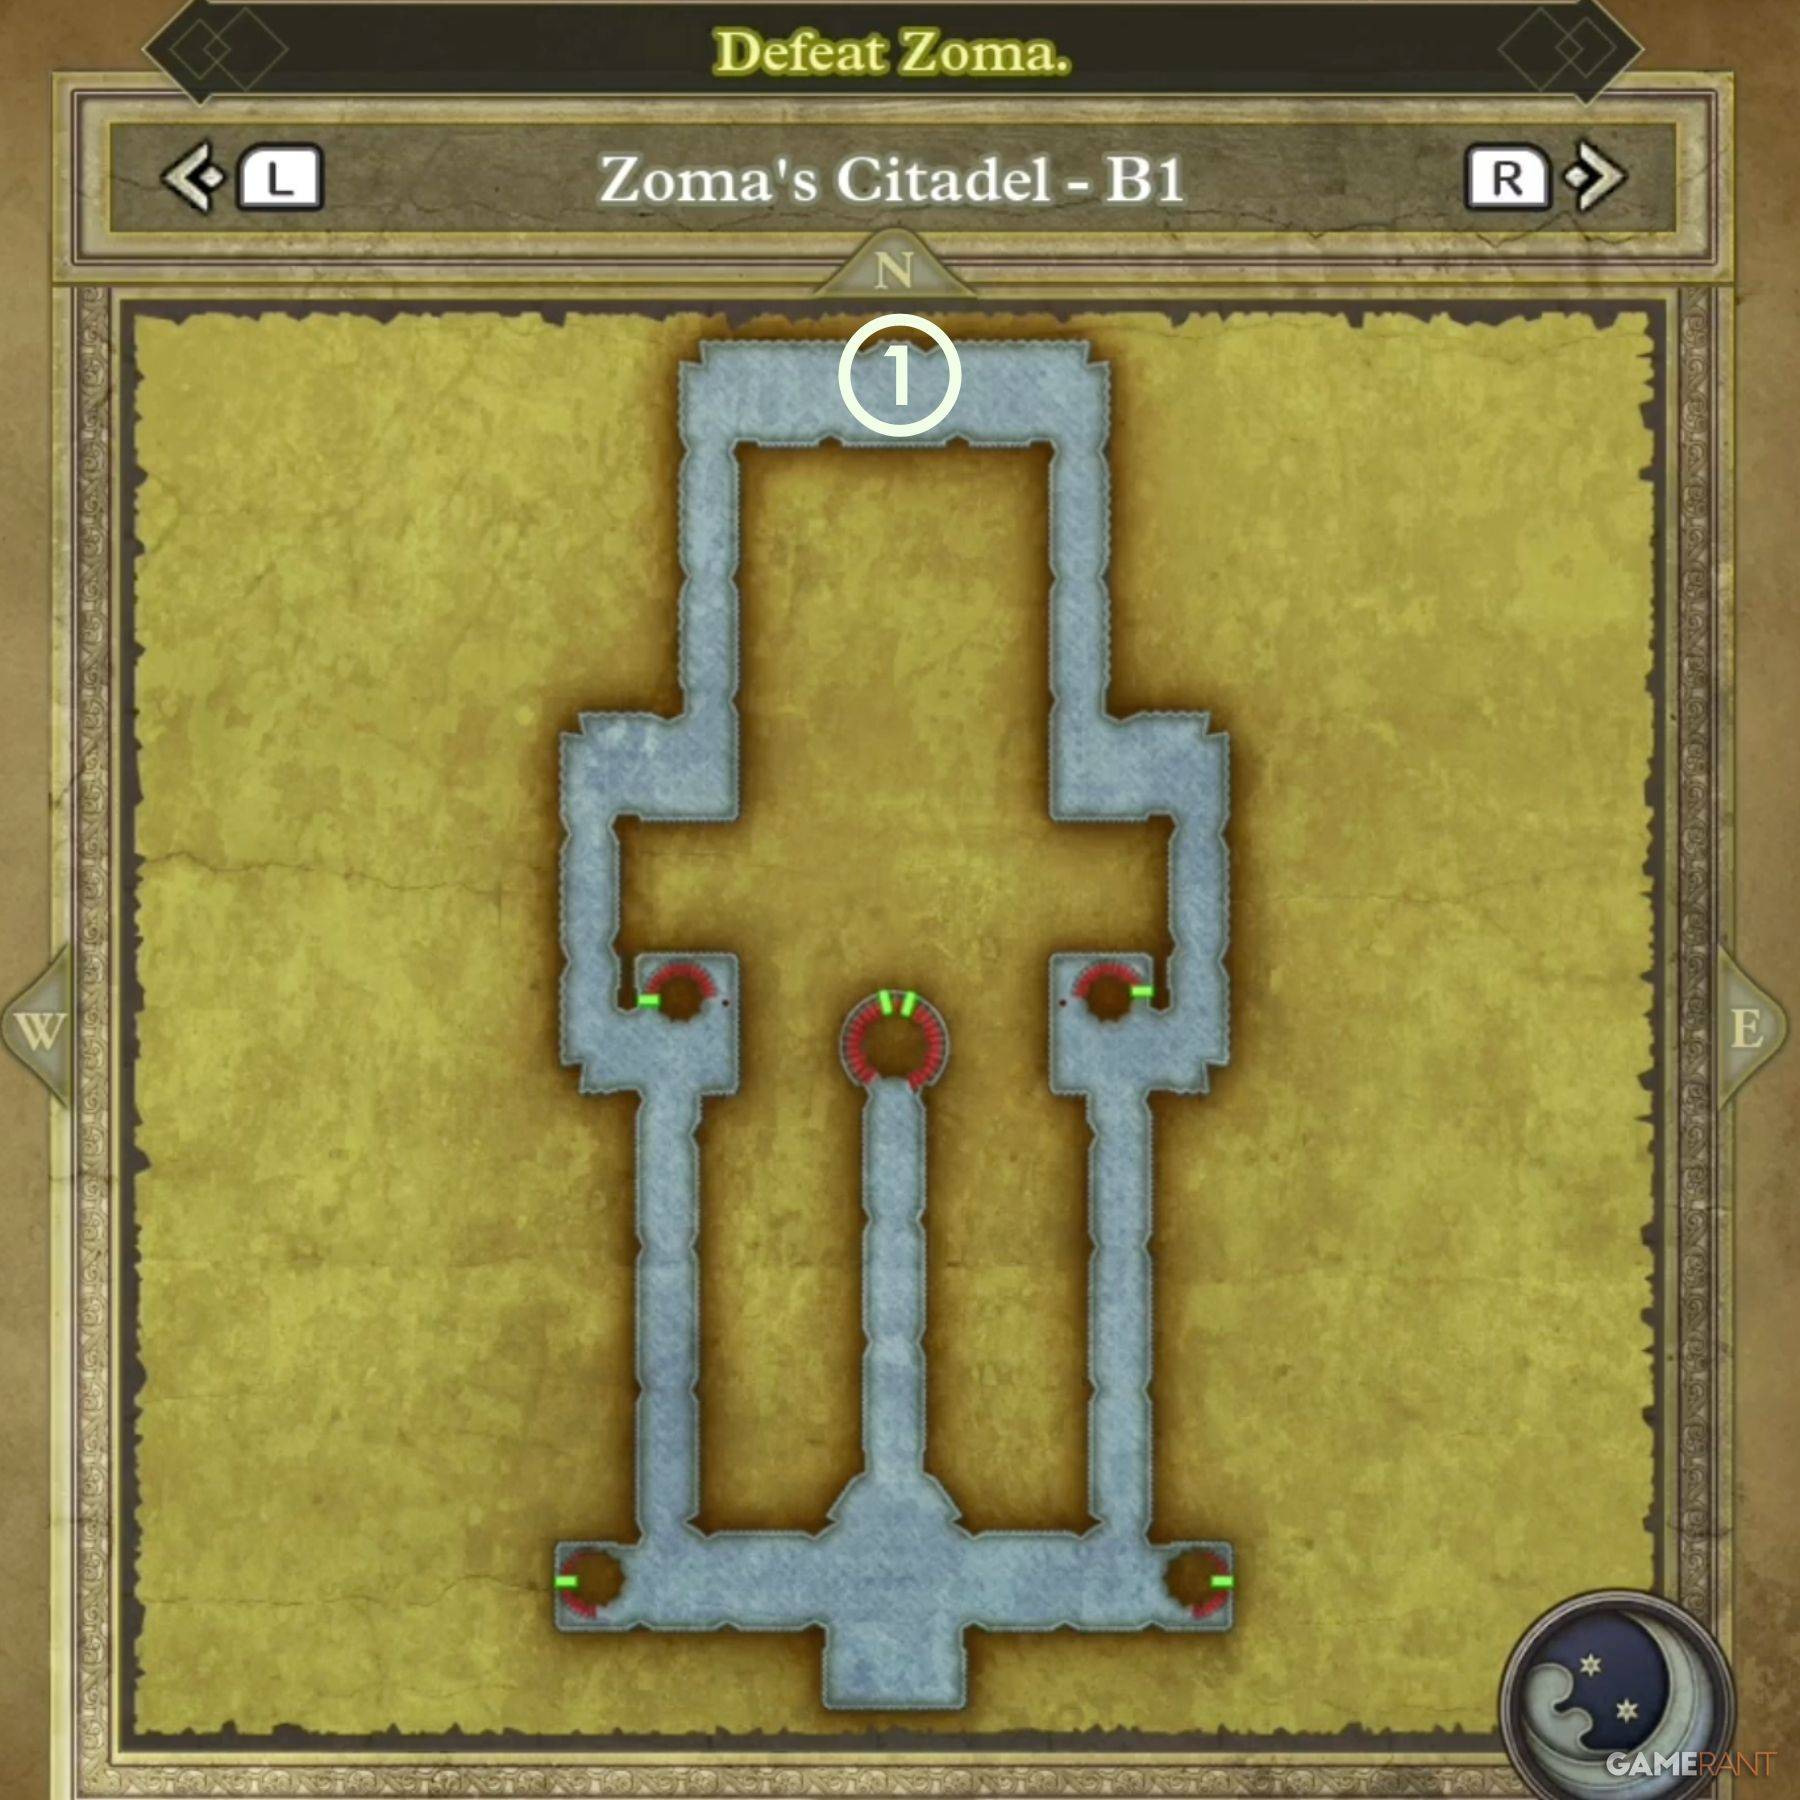
B1 is straightforward, primarily a staircase to B2. However, alternate staircases from 1F lead to an isolated chamber containing:
Zoma's Citadel B2
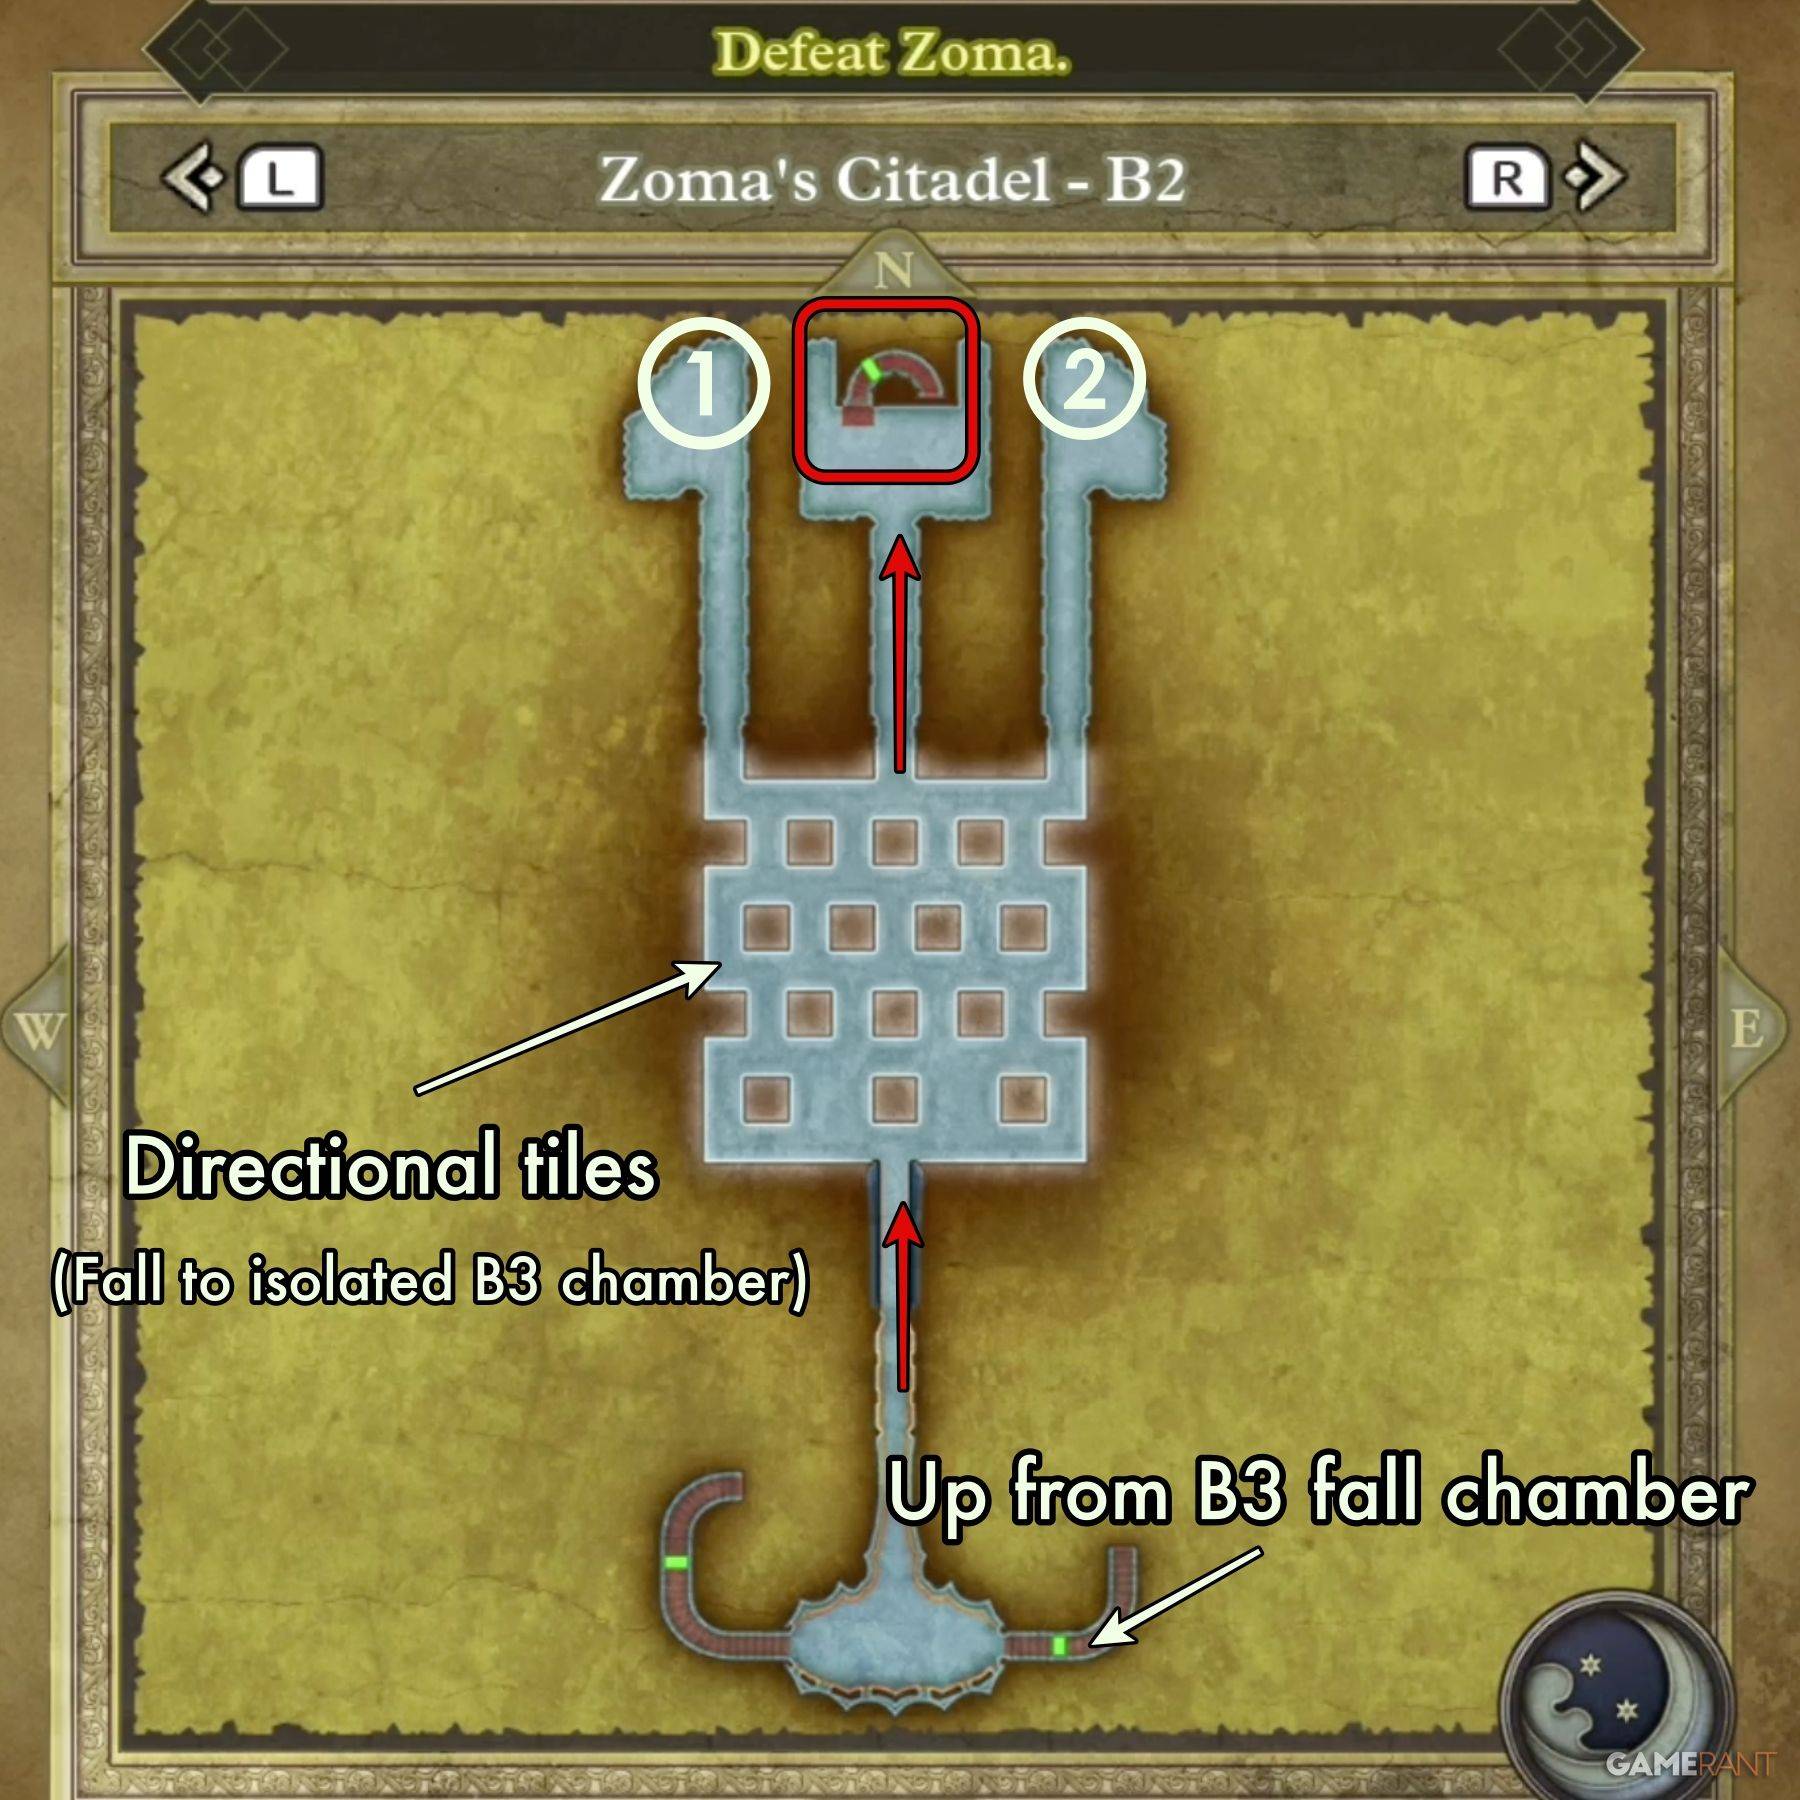
This floor features directional tiles. Mastering them is crucial. Practice in the Tower of Rubiss (3F, NW corner) if needed. The key is understanding the color-coded directional indicators. After navigating the tiles, descend the stairs. Treasure includes:
Zoma's Citadel B3
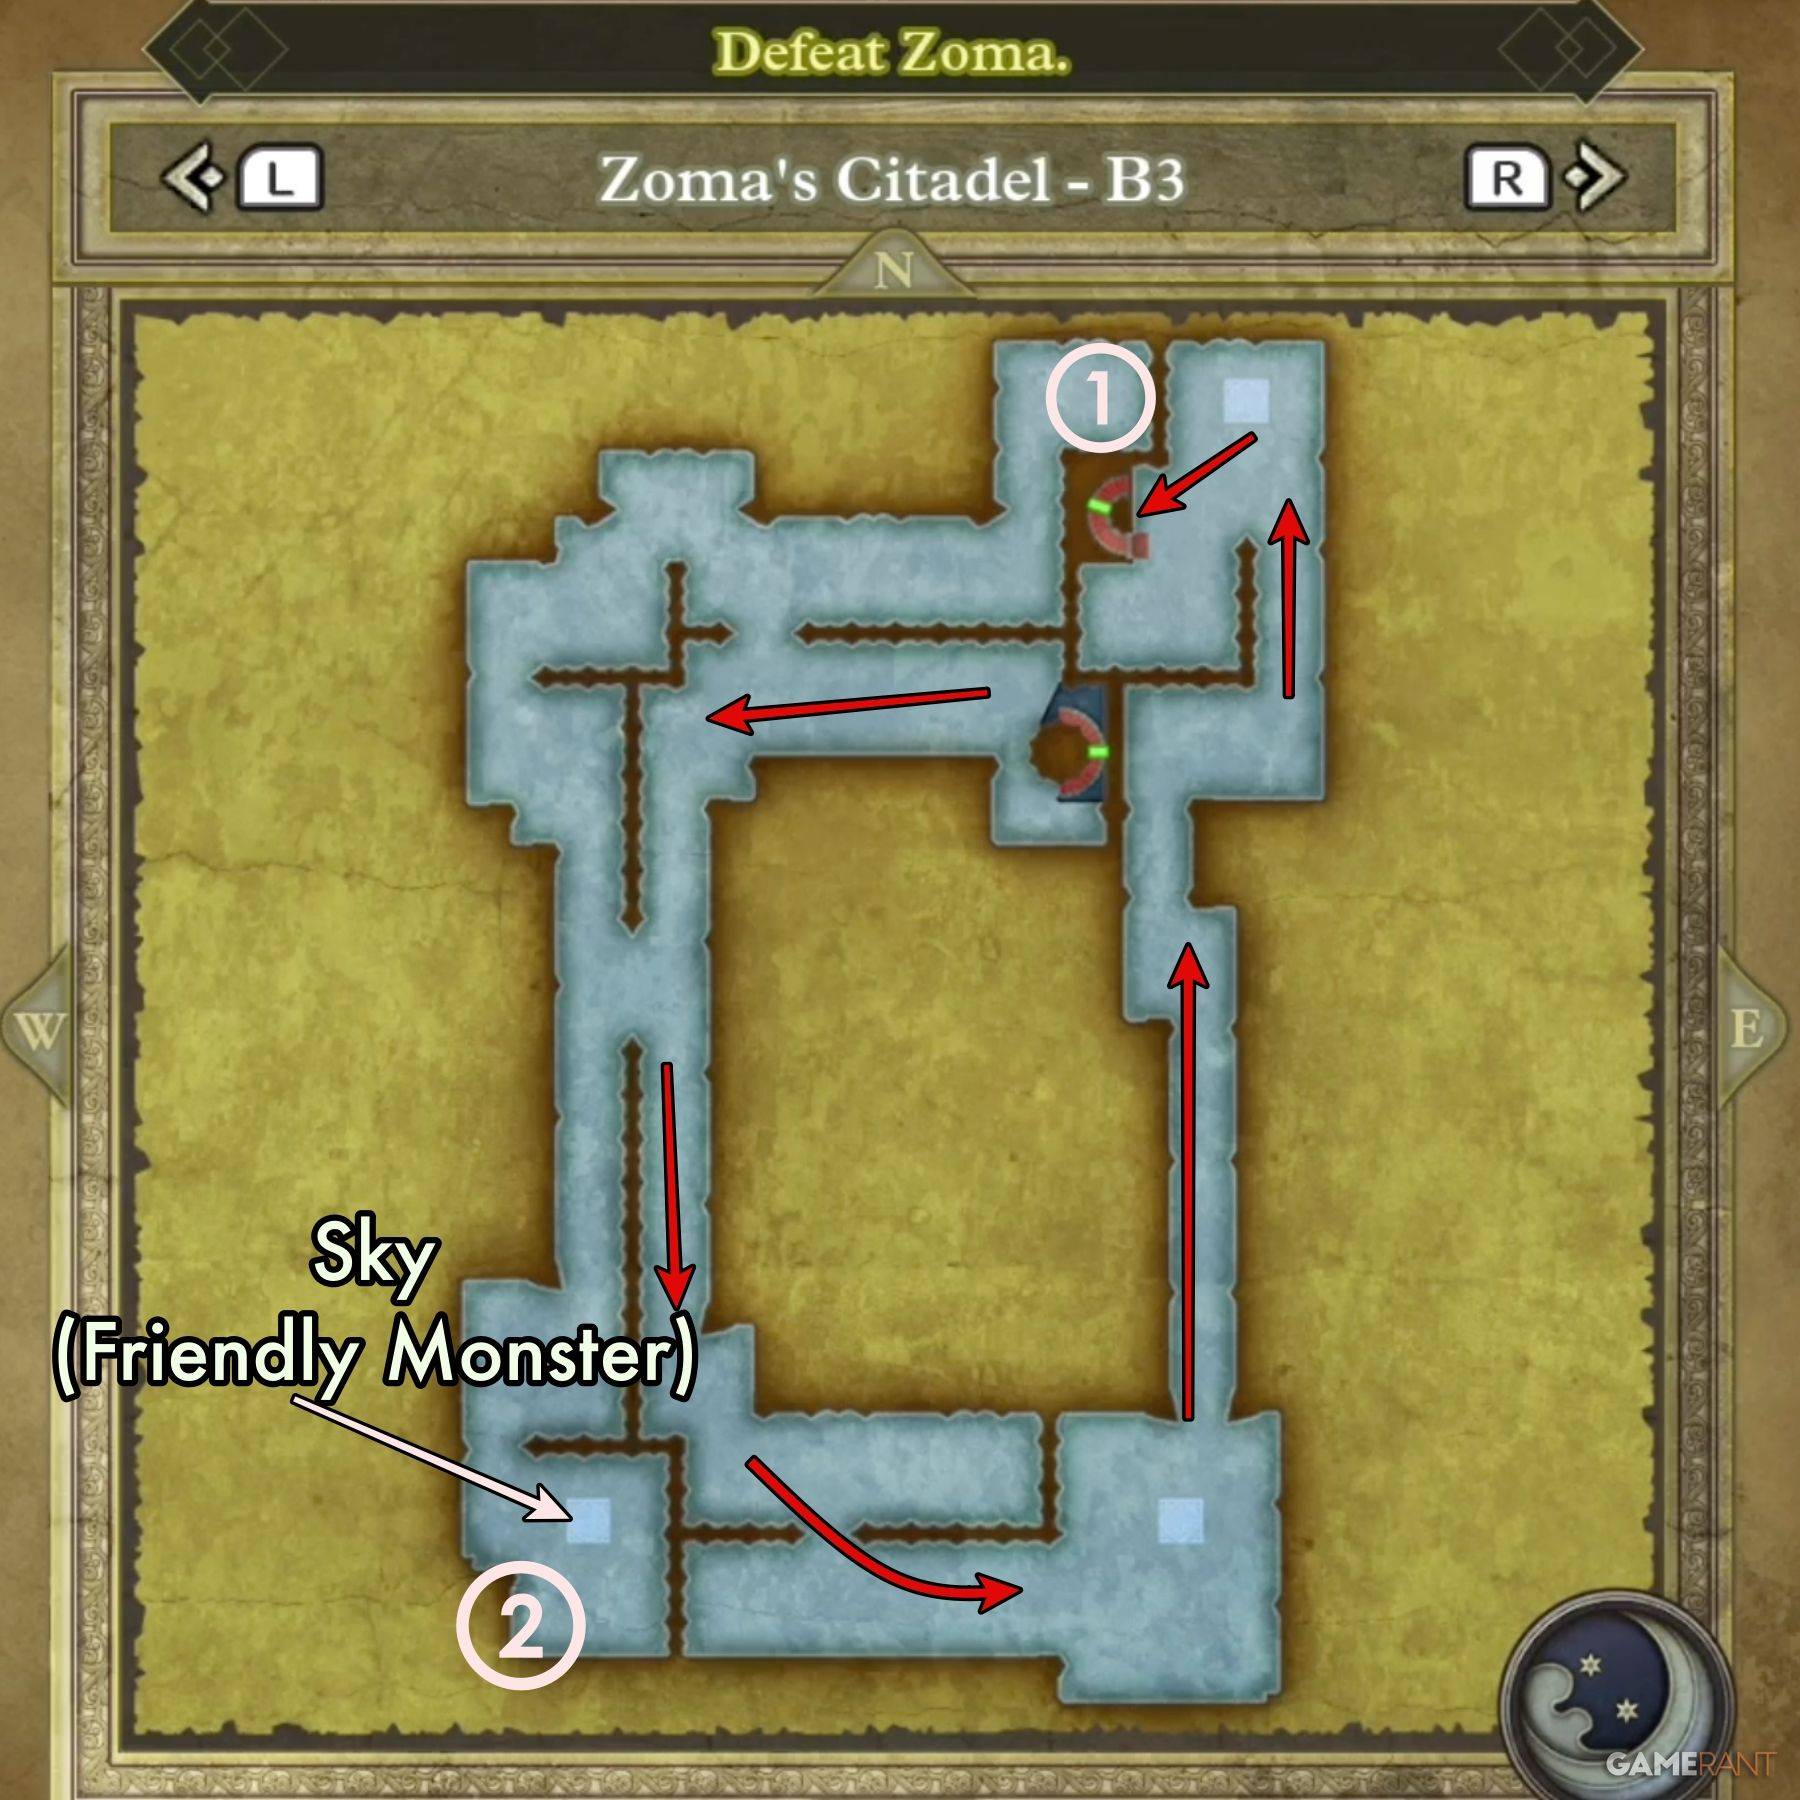
Follow the outer edge of the chamber on B3. A detour to the southwest reveals Sky, a Friendly Monster. A separate isolated chamber (accessible via B2 tile falls) contains another friendly monster, a Liquid Metal Slime, and a chest:
The main chamber holds:
Zoma's Citadel B4
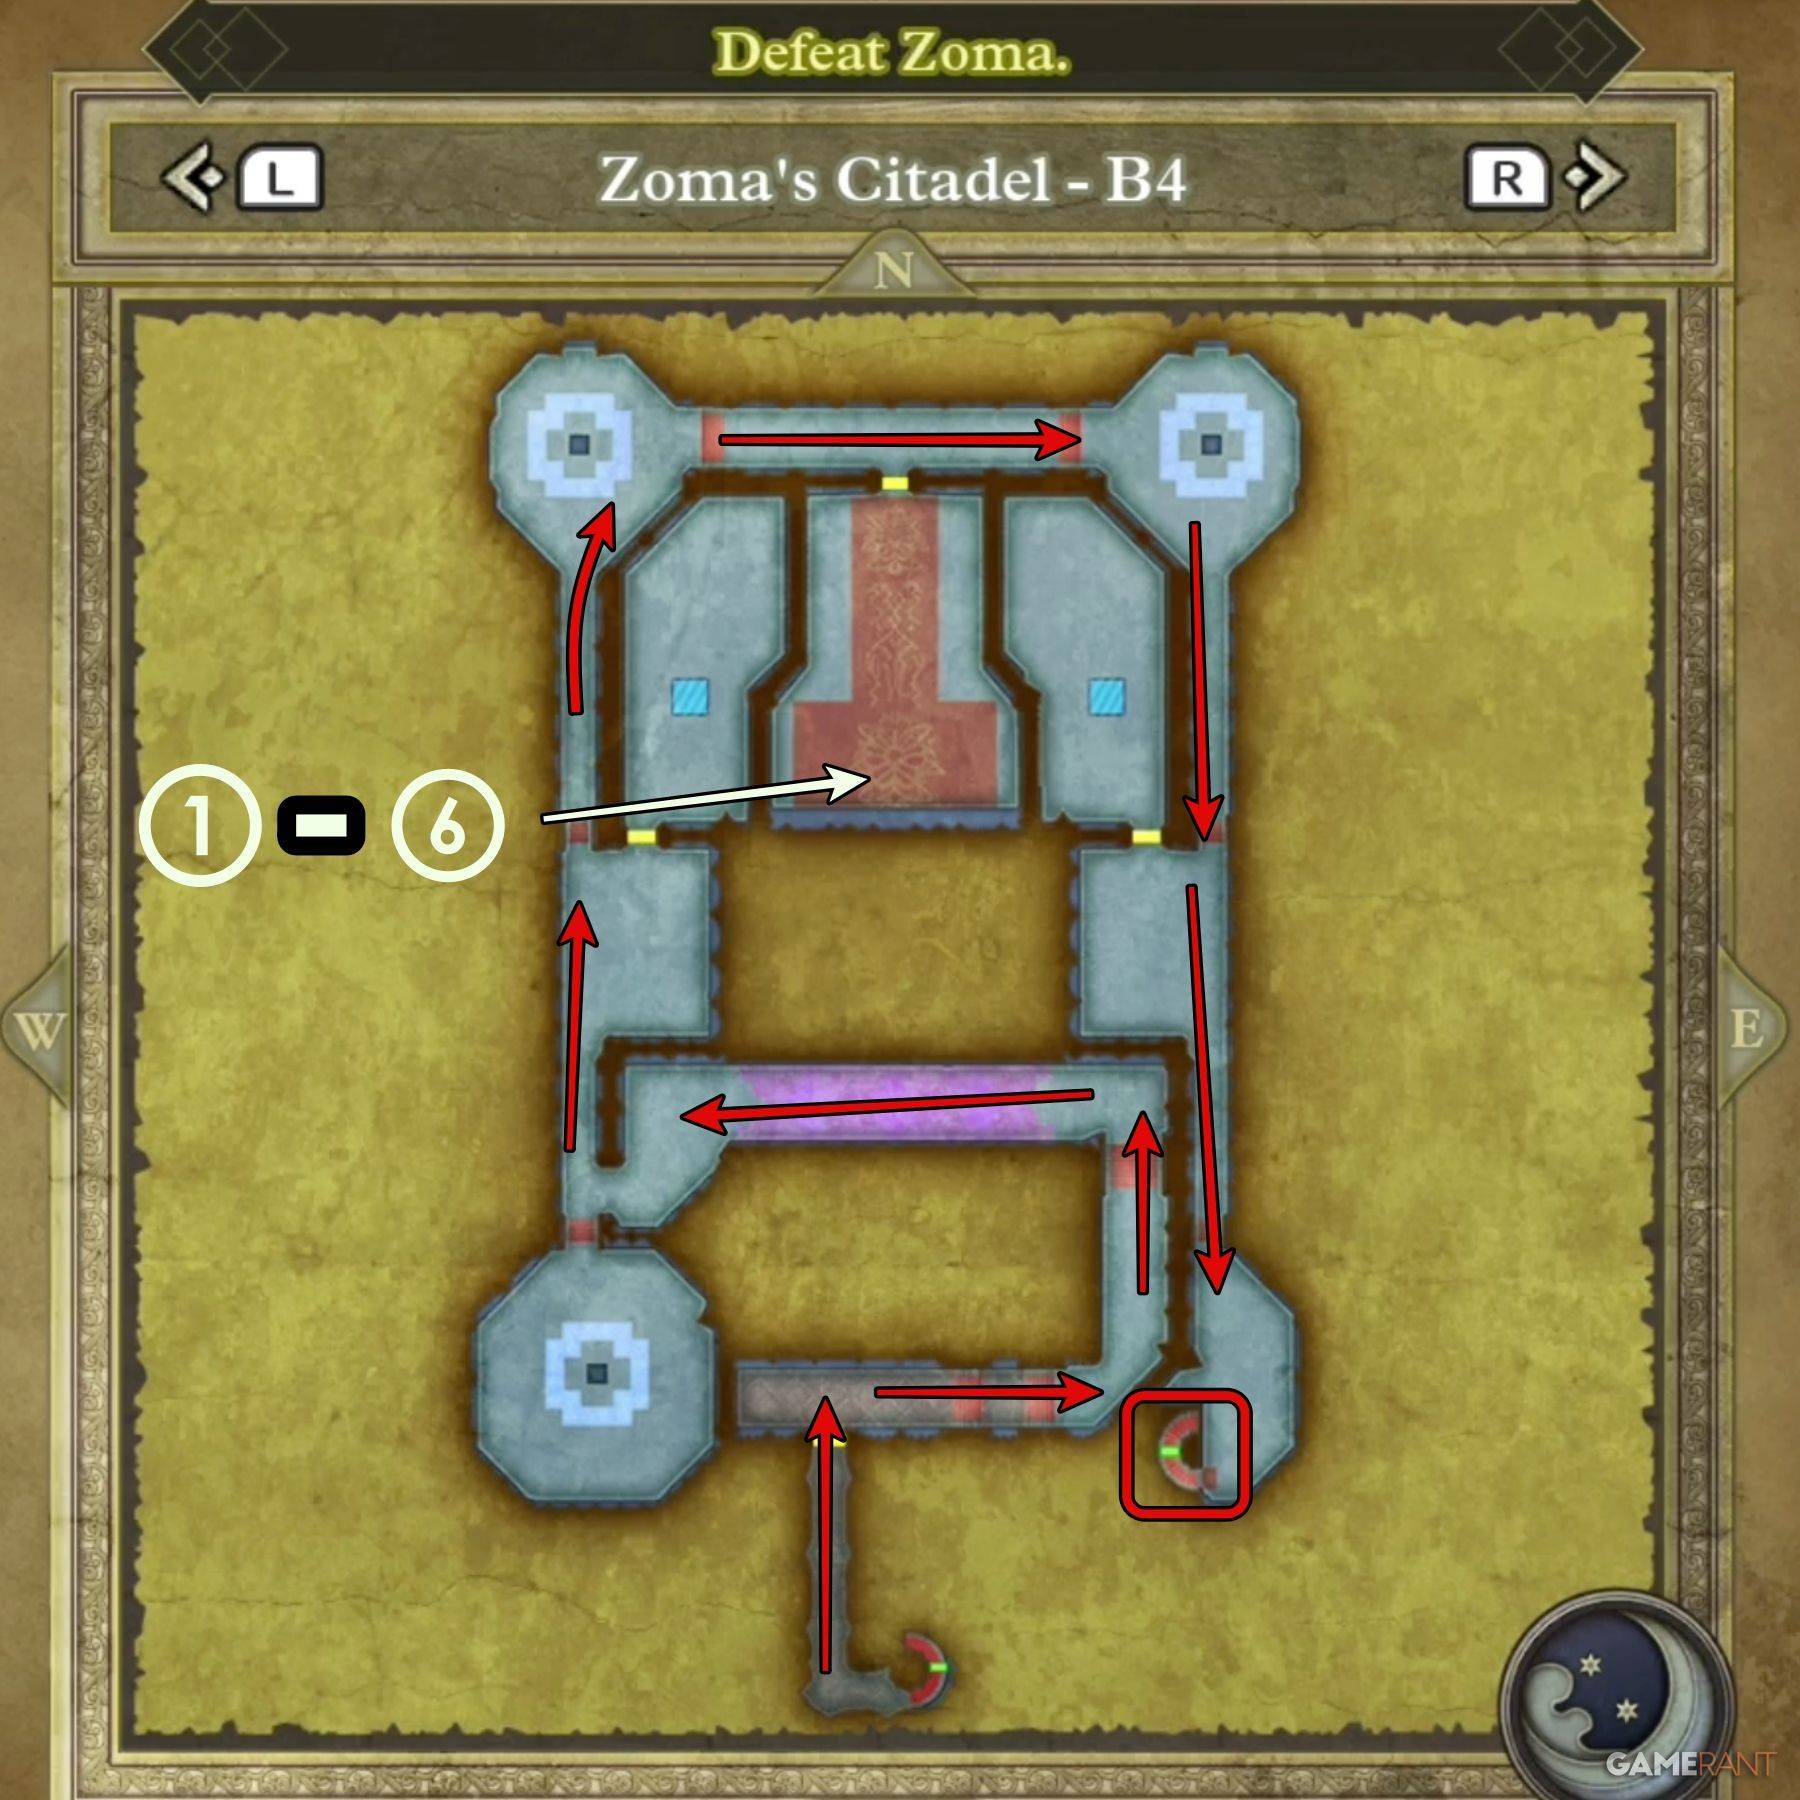
B4 is the final floor before Zoma. Navigate from the southern center, upwards and around, to the southeast exit. A cutscene awaits upon entry. Six chests are found in one chamber:
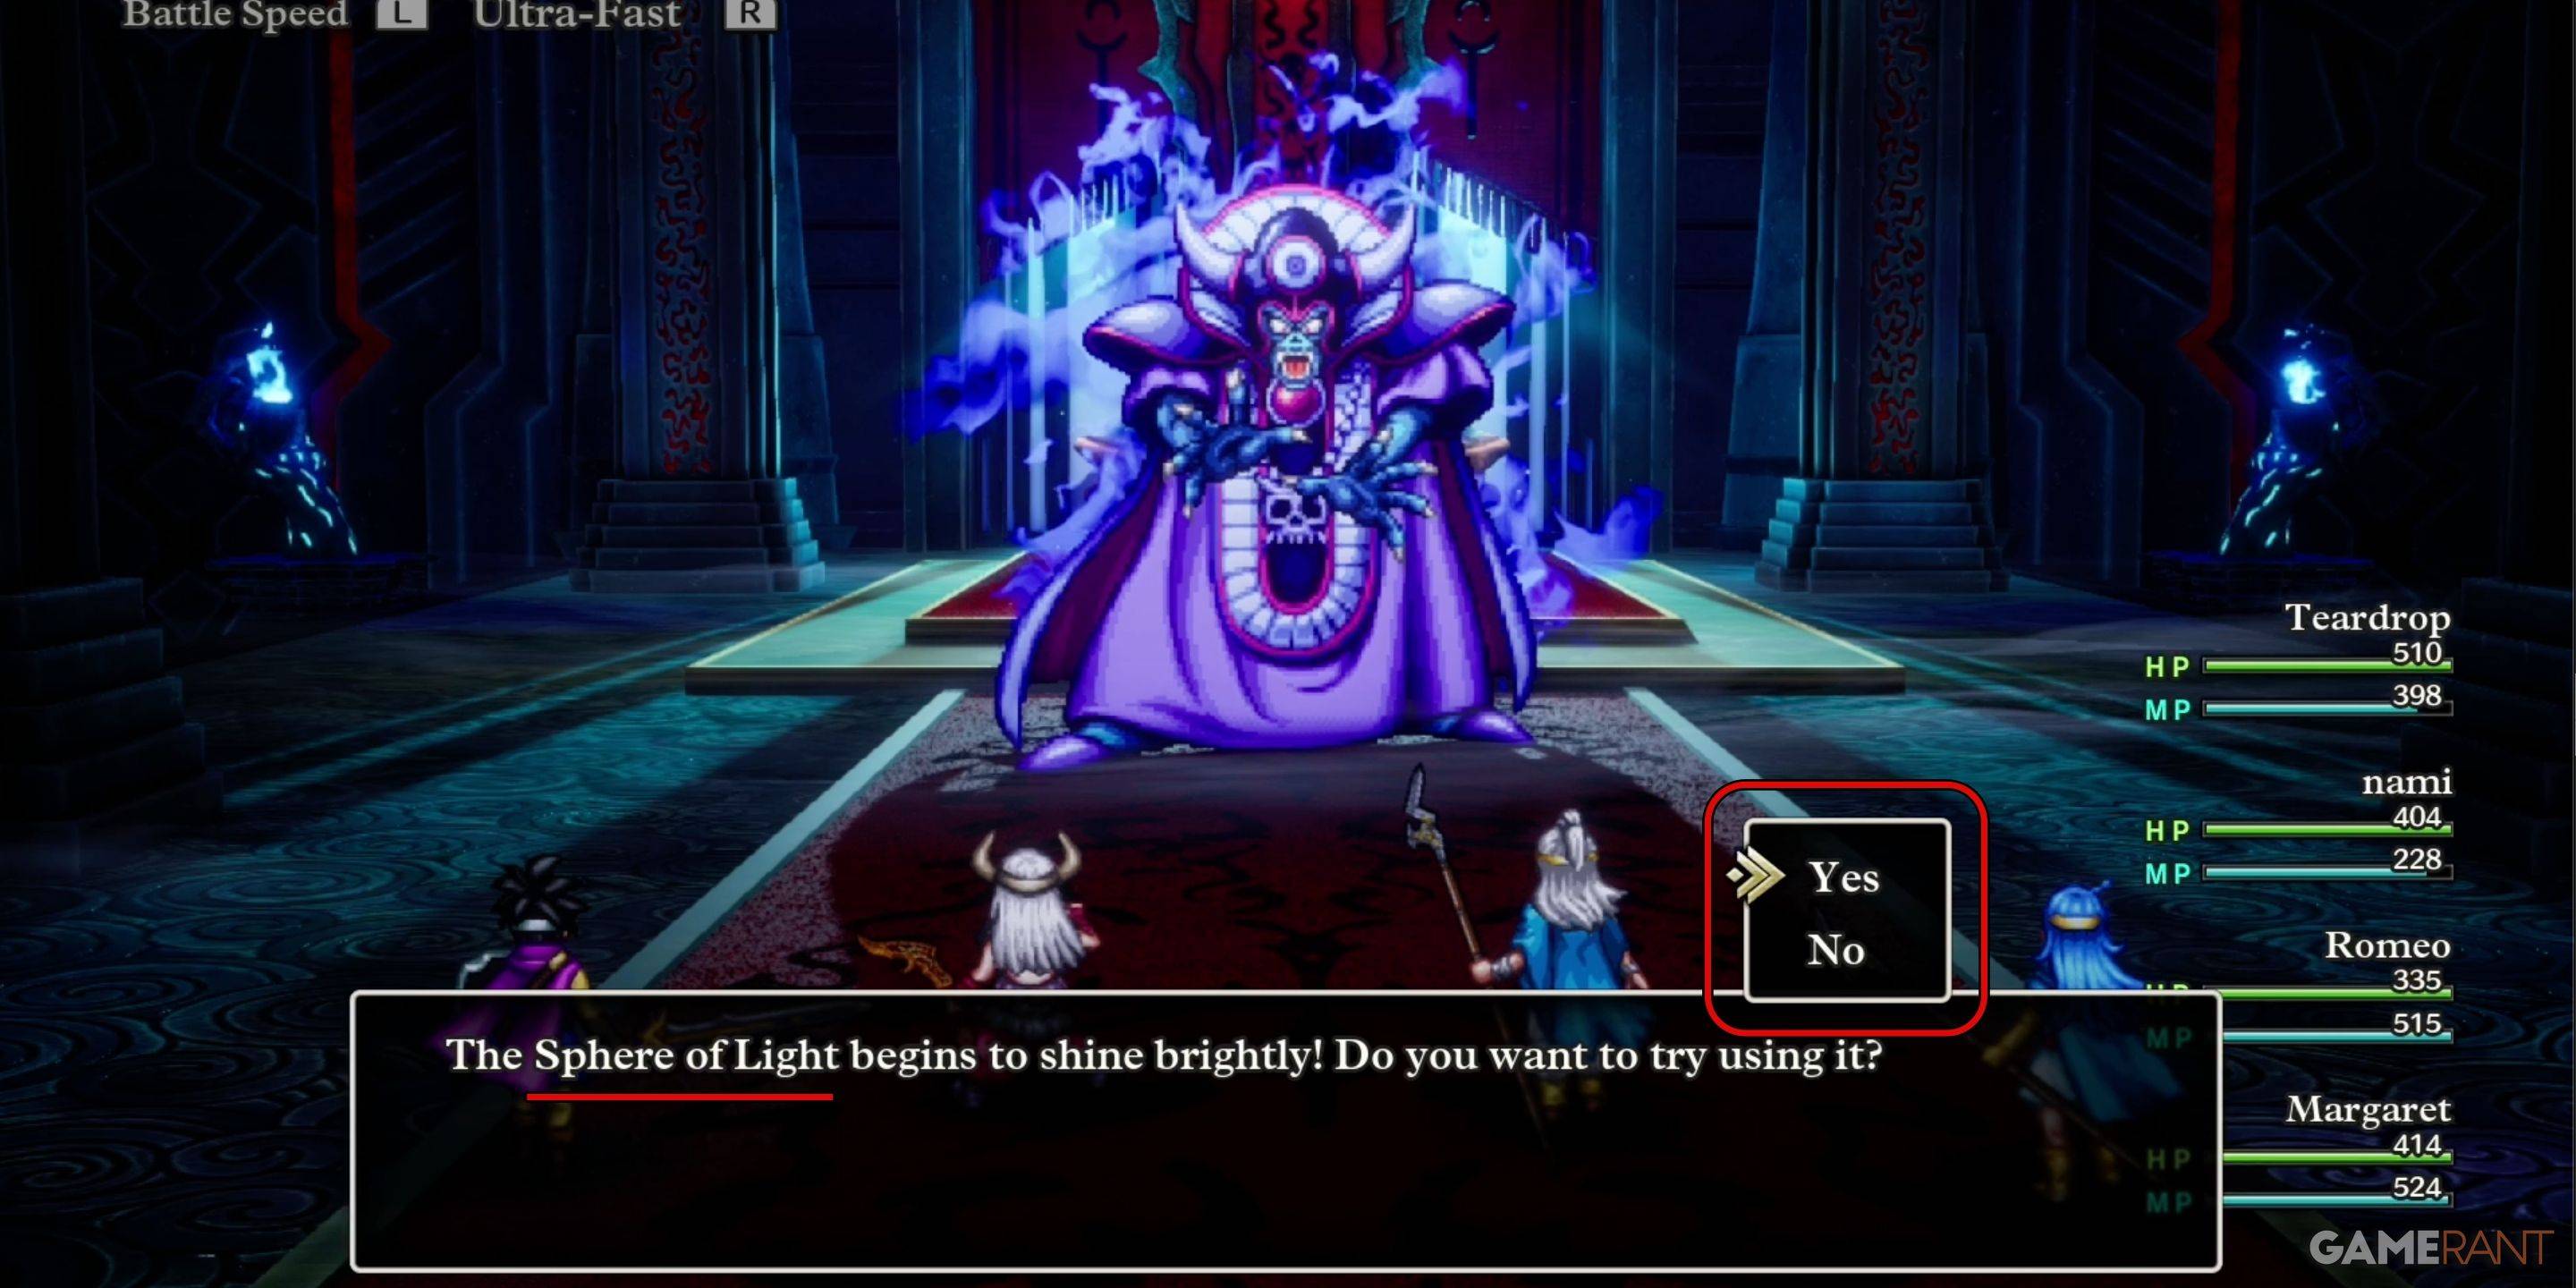
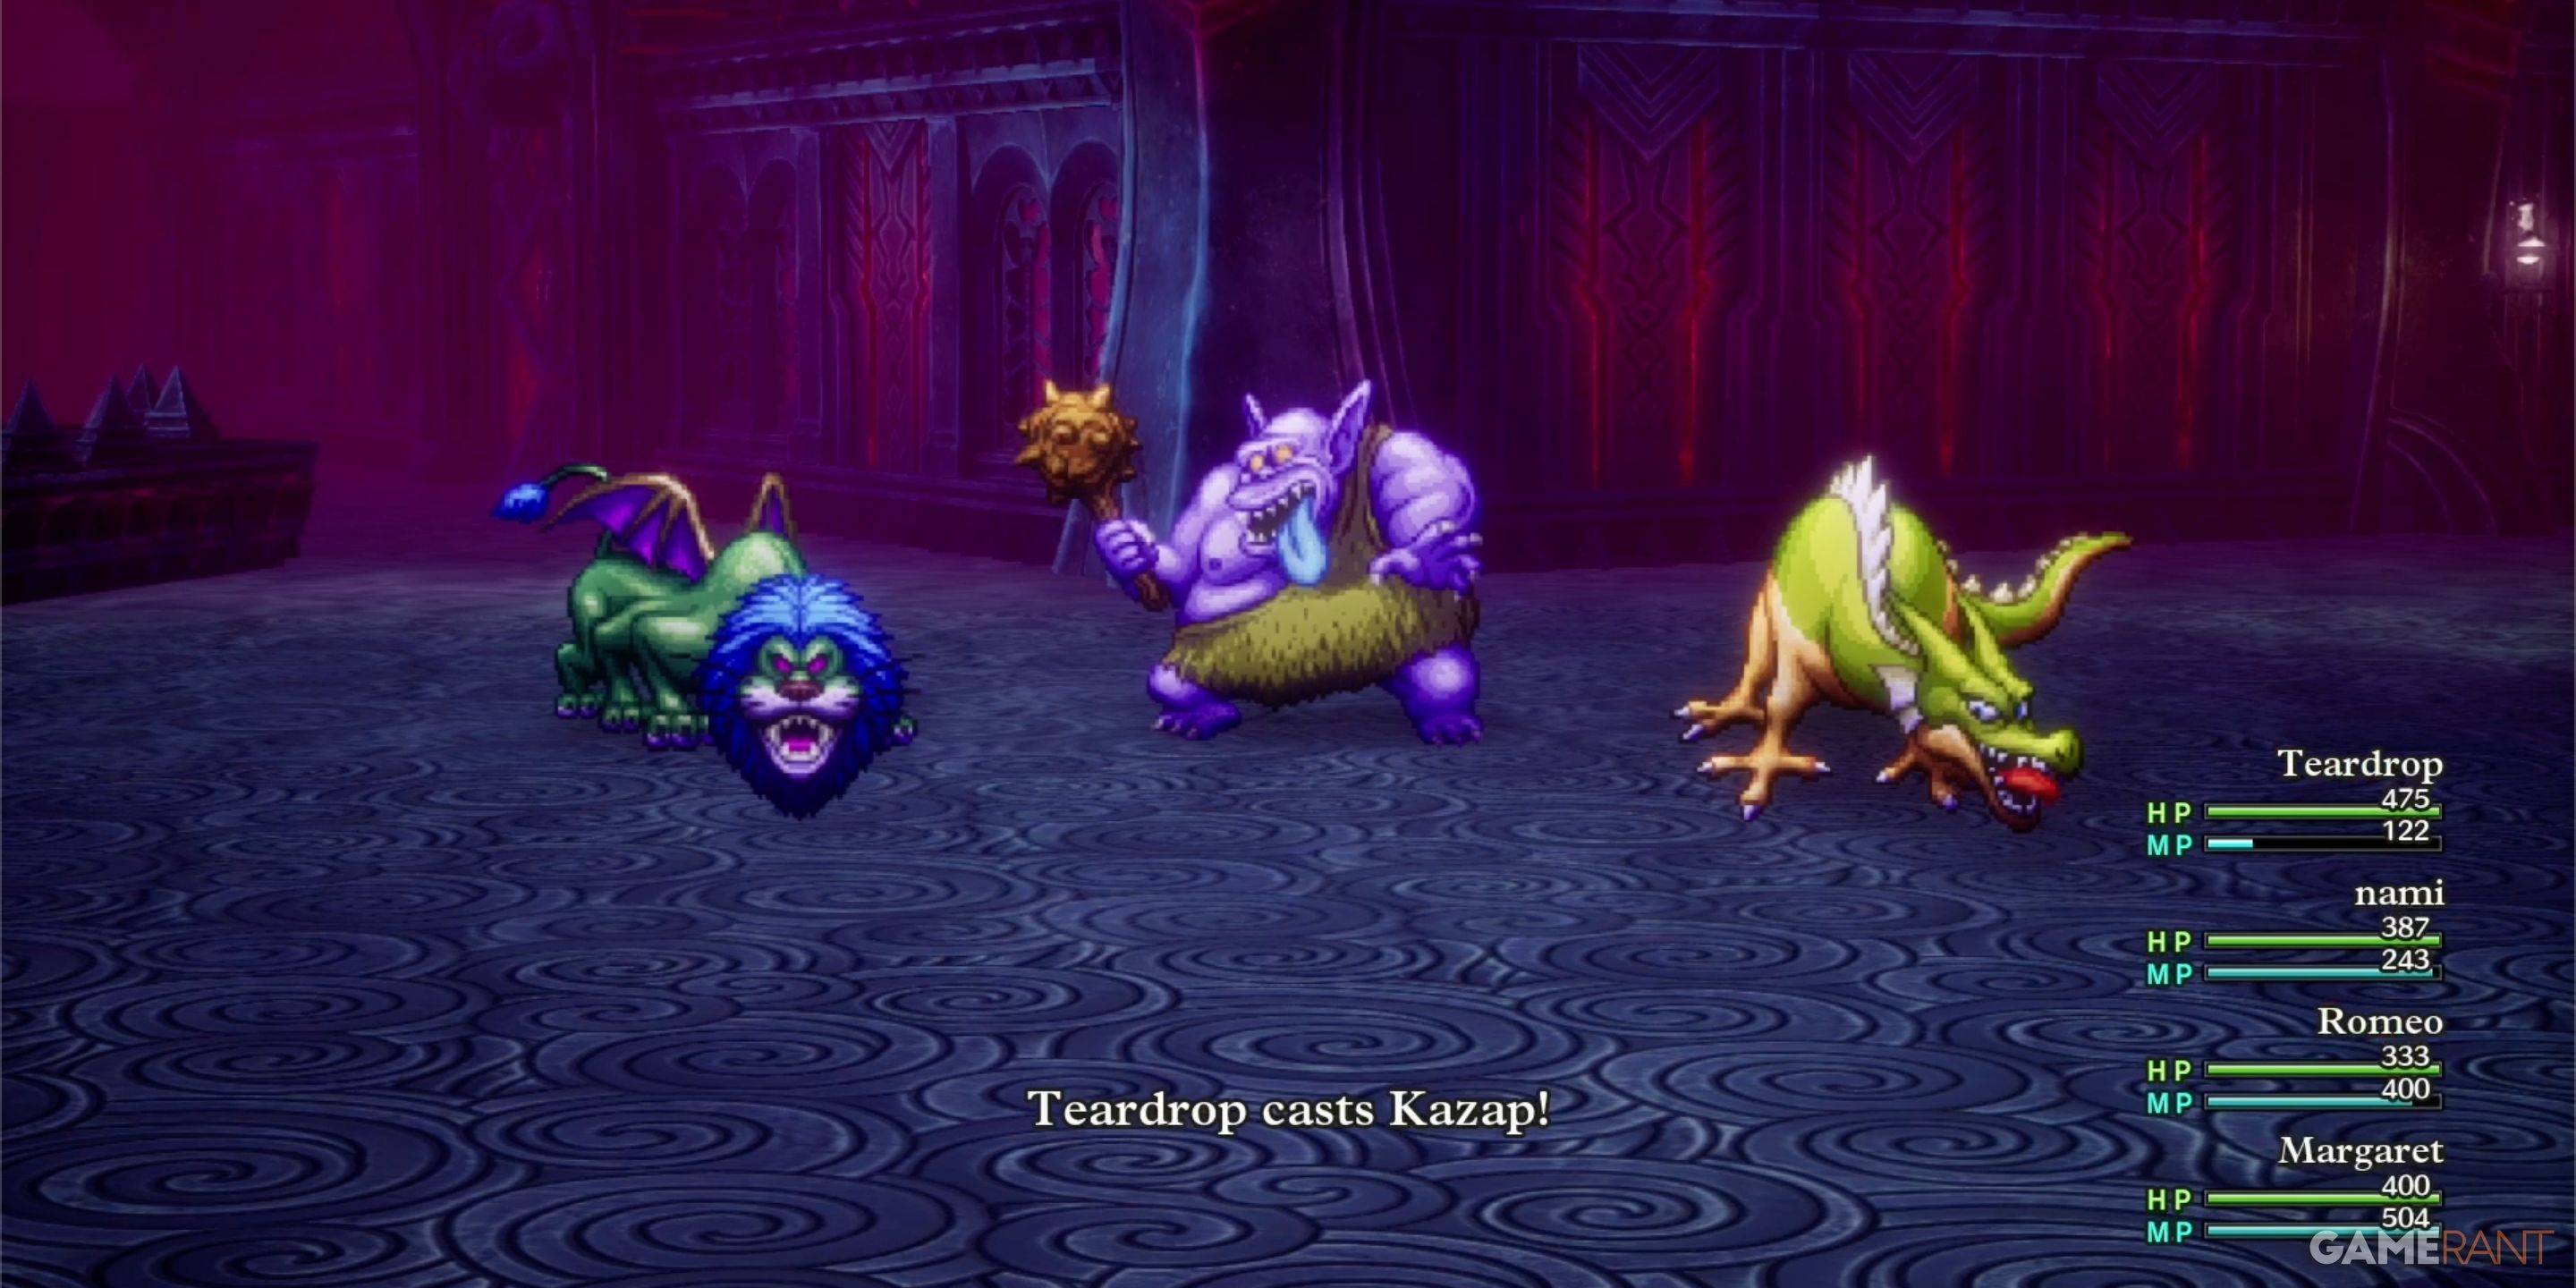
Defeating Zoma

A boss gauntlet precedes Zoma: King Hydra, Soul of Baramos, and Bones of Baramos. Use items between fights.
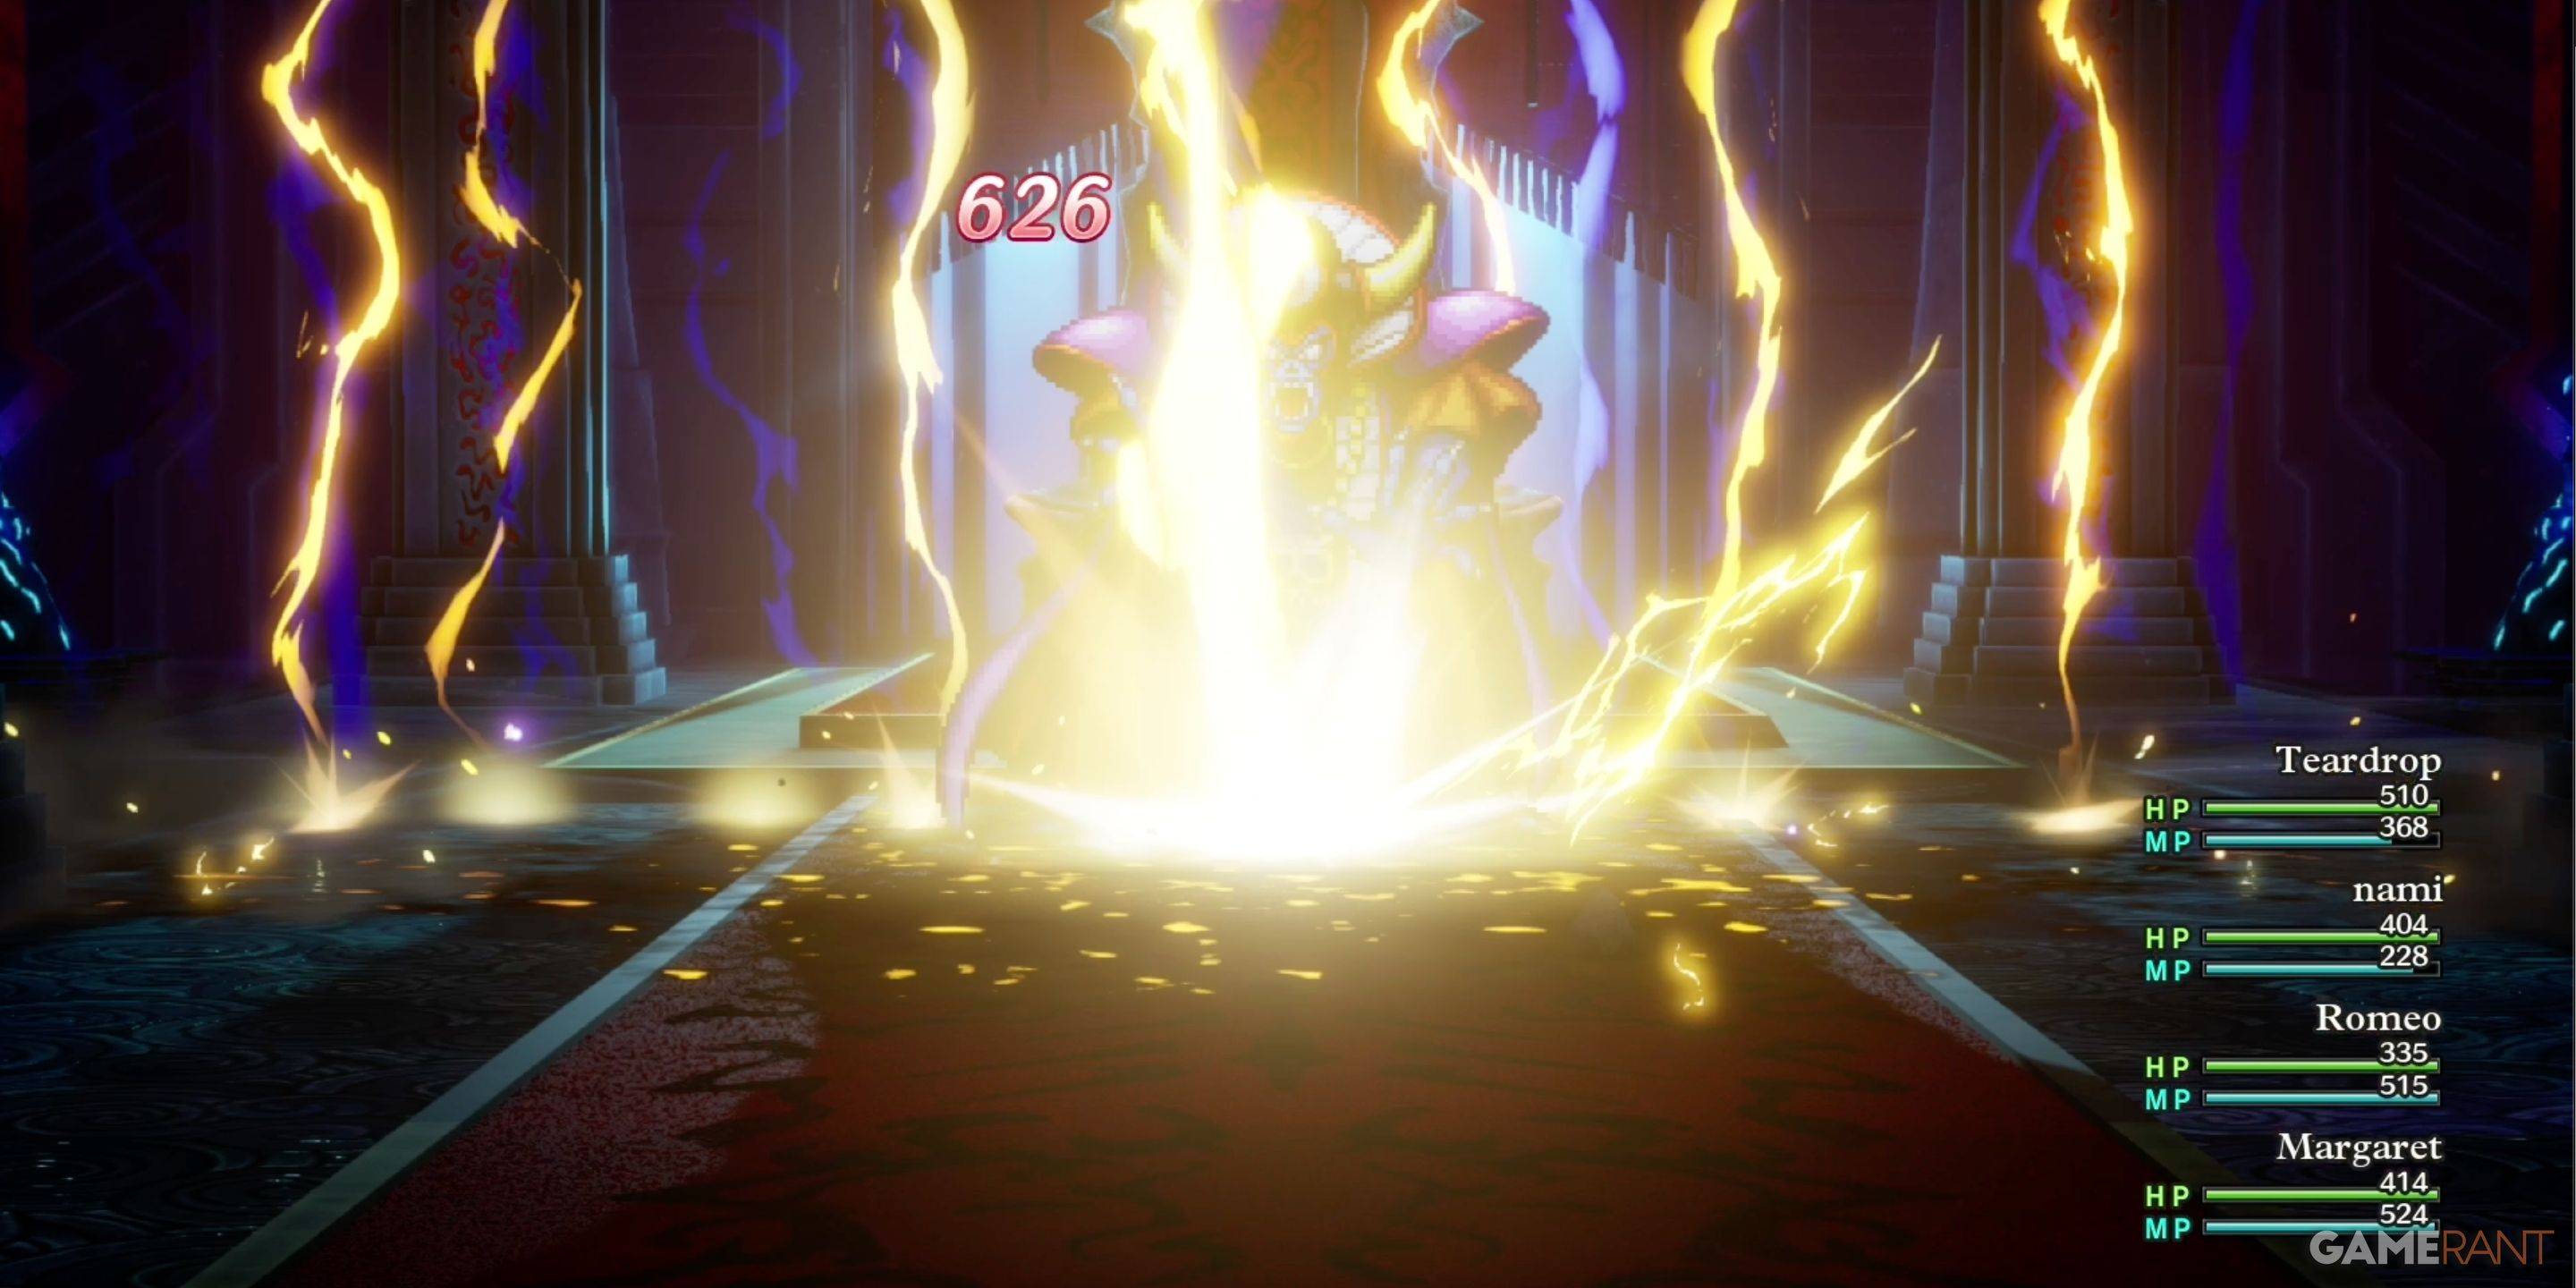
Zoma himself has a magic barrier initially. Wait for the prompt to use the Sphere of Light, removing the barrier and making him vulnerable to Zap attacks (Kazap is highly effective). Prioritize HP and MP management; a strategic, rather than aggressive, approach is key.
Monsters in Zoma's Citadel
| Monster Name | Weakness |
|---|---|
| Dragon Zombie | None |
| Franticore | None |
| Great Troll | Zap |
| Green Dragon | None |
| Hocus-Poker | None |
| Hydra | None |
| Infernal Serpent | None |
| One-Man Army | Zap |
| Soaring Scourger | Zap |
| Troobloovoodoo | Zap |
This comprehensive guide will help you navigate Zoma's Citadel and ultimately defeat Zoma in Dragon Quest 3 Remake. Good luck!

![NULL [Remastered]](https://imgs.39man.com/uploads/71/1719651062667fcaf6c483b.png)